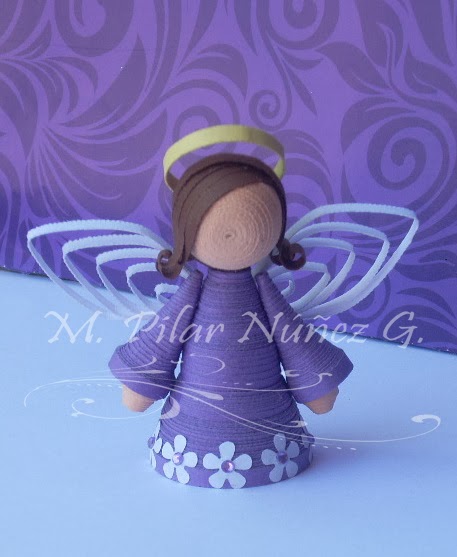
Tutorial Angel en Filigrana de Papel - Tutorial Quilled Angel (By Pily Núñez)
What you need:
- Quilling strips: The width of the strips used is 3mm
- Glue
- Toothpick
- Quilling Tool- up to you if you want to use a slotted, pointed or no tool at all.
- Comb
- Optional: marble or something round
- Optional: Some decorations for the dress
Head:
Make 2 tight coils using 1 m. and 30 cms x 3mm strips.
Paste as many strips as you need to create the
required length
And then you must give this shape.
For this you can use any round object.
Apply glue to the inside and let dry.
Then glue the both halves together
Hair:
Cut 10 little strips (3cms) to make the hair style.
Dress/ Body:
Make a tight coil using 4 meters (remember glue any
strips as you need) and then give the cone shaped dress.
Arms:
Roll into a cone shape a strip (75 cms.) with a needle
if you want. Repeat this to make the other arm.
Hands:
Make 2 tight coils using 20 cms strips. And then give
this shape.
Halo:
Make a ring 2 cms. Diameter. You can do this rolling
the strip around a circle form.
Wings:
Wind a strip in a comb in this form and apply a bit of
glue in every loop.
Make 2 and glue both together in this form:
Assembly
Glue the hands to the arms
Glue the arms to the dress/body
Glue the head to the dress/body
Glue the head to the dress/body
Glue the halo to the head
You can decorate the dress as you like.


Thanks for sharing. ..iam self learned quiller....so your tutorial with measurements will really help. Thank you.and I love your work.
ResponderEliminarI am very glad that my tutorial can help you.
EliminarThank you so much...This is really helpful for me as a beginner of 3D Quilling....Very beautiful...
ResponderEliminarI am glad the tutorial can help you
EliminarThank you very much for the inspiration and showing how to make so cute things. I also try to play with quilling:)
ResponderEliminarTry! You will love it :)
EliminarThank you for this tutorial. It has inspired me to start quilling :)
ResponderEliminarYou´re welcome! I'm happy to inspire you. :)
EliminarI made my first 3D quilling art with the help of your guide. It was very helpful. Thanks alot
ResponderEliminarI am very happy that my tutorial has helped you. Thank you for your visit!
Eliminar